An Adjustable Stride for a Successful Jump
by Karen O’Neal
 Winter is a great time to work on technique, position, control, and overall training for show jumping.
I teach a lot of riders in my program and find that one of the most difficult tools to teach is the ability to see a distance to a fence. A large reason for this difficulty is that many riders don’t have control of their horse’s stride length nor do they possess the training or tools to adjust the horse’s stride.
In this first article you will learn exercises that are easy to set up and practice at home, allowing you to gain control of your horse’s canter. Whether you have an advanced horse that likes to take over after a jump, a green horse that isn’t confident on either side of a jump, or a horse that is just generally out of control, this exercise will get both you and your horse more connected and adjustable.
To start, you will need 6 standards and 16 poles, although you can modify the exercises as needed if you have limited space and or equipment.
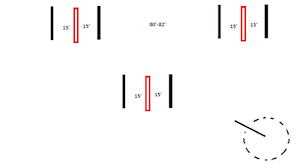
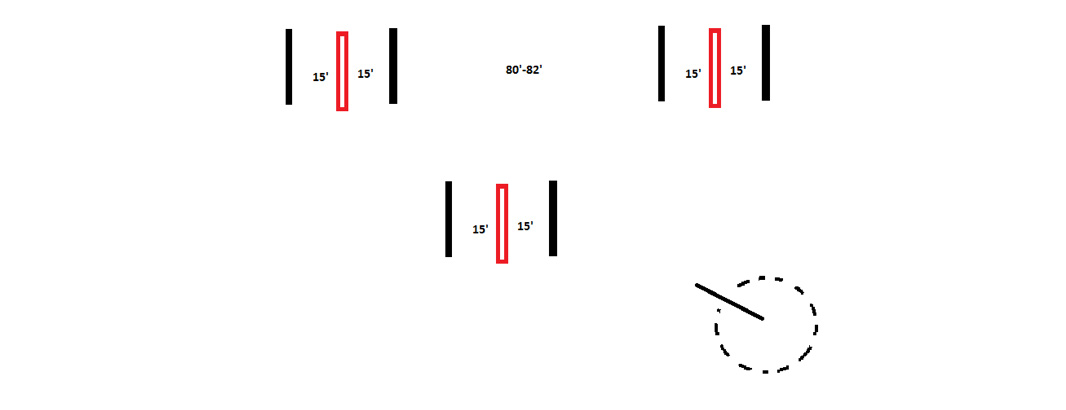
In the middle of the arena place a small vertical 2′ to 2’6″ for more experienced horses, or a small cross-rail for greener horses. Place a ground line in front and back of the fence and a pole 15 feet on both sides of the fence. Then, on one side of the arena place the same exercise on a line with two jumps keeping the two jumps 80 to 82 feet apart.
When I’m teaching this lesson I have riders warm up at the walk, trot, and canter, testing their horse’s control by playing with the canter by lengthening and shortening their strides. I also have the riders canter on a small circle and work on halt transitions using their voice. Using the voice gets the riders to achieve a softer feel in the halt and not be so aggressive with their hands.
Once the riders and horses are warmed up and achieving some adjustability on the flat, I will have them canter a single pole on a circle, extending and compressing the length of stride to the pole.
The next step is where the exercise gets tricky. Once the rider is cantering the pole with control, I have them canter the single fence in the middle of the arena with the 15-foot rails, placing one stride in between the rail and the small fence, land, and place another stride between the fence and the second rail. Keep in mind before you start the exercise that putting one stride in a 15-foot distance is extremely short for a horse with a natural 12-foot stride. (You have to allow space for take-off and landing, so a comfortable distance would normally be about 18 feet.)
This exercise requires you to compress the horse’s stride to about 7 ½ feet from a typical 10 to 13-foot stride on both take-off and landing. Some horses will try to bounce the exercise (not put a stride between the pole and the fence) on either the take-off or landing sides or both. If this happens, you will need to modify the exercise and go back to doing canter to halt on a small circle before you approach the exercise again.
To modify the exercise, just move the 15-foot rails out to 16 or maybe 17 feet until you can be successful and then slowly bring the rails back closer to 15 feet. Remember, you want to keep the exercise achievable and allow your horse to feel positive that he is understanding the goal.
Next do the two fences set on the line. Only do this step when you have easily achieved the first exercise; it might have to be on a different day.
As before, canter the first fence in the line, getting one stride between both the 15 foot rails, then maintain the stride length to the second fence with the same result.
If your horse gets strong, speeds up, or breaks to a trot between the two fences, ride a 10 to 15-meter circle immediately and regain the canter you had to the first fence, then continue to the second fence.
Make sure you do these exercises on both leads, practicing the more difficult lead more so you can achieve balance.
These exercises can be extremely difficult, so don’t get frustrated. Always remember to make a correction by circling, halting, or doing a transition, rather than punishing. Remember to control your position and have an educated eye on the ground to help you stay correct in the saddle.
Once you master these exercises (which could take some time and multiple schoolings) you will feel a great sense of connection with your horse and control of the stride length.
I hope this helps you with your winter training and remember to always keep it positive and fun.
A lifelong horsewoman, Karen O’Neal bases herself and her business in Kent Washington, where she and Sarah Matuzweski train and operate Freedom Run Equestrian. Karen has brought multiple horses and riders up the levels of eventing to the advanced level. She is also a successful trainer and competitor in dressage, jumpers, and equitation. She is well-known as the trainer of True Avenue, who was USEA top 10 mares in 2010 and 2012, and Markus. Known for her ability to take less-than-average horses to the top of the sport, Karen is also an experienced USEA Level III Certified Instructor. She is in the process of finishing her USHJA Instructor Certification. Karen enjoys getting the most out of her students and is an accomplished instructor and clinician. To learn more about Karen or to contact her anytime, visit www.onealfarms.net, (541)-3503797 or [email protected]


